Getting started
Getting started — your account, your workspace, and your first week
Make an account, understand what gets created with it, and work through the six steps that turn an empty workspace into one your crew can use.
This is the first thing to read. It covers making an account, what gets created with it, and the handful of steps that turn an empty workspace into one your crew can use.
It takes about ten minutes to get to something useful, and most of that is deciding what to call your networks.
Create your account
Go to Sign up and fill in one short form. There is no trial to start, no card to enter, and no sales call in the way — the free plan is a real plan and you can stay on it.
Four things are asked for:
- Your name — how you appear to your crew.
- Organization name — your club, department, business or land trust. This becomes the workspace everything lives in, so use the name your team would recognize rather than an abbreviation.
- What does your team do? — three choices, covered below.
- Email and password — your sign-in.
When you press Create account we email you a six-digit code, and a Confirmation code box opens on the same form. Type the code in and press Create account again. Your account is created and you are signed in. The code works for 15 minutes. If it does not arrive, check your spam folder or press Send a new code. Somebody who followed an invitation link skips the code, because the invitation already went to their address.
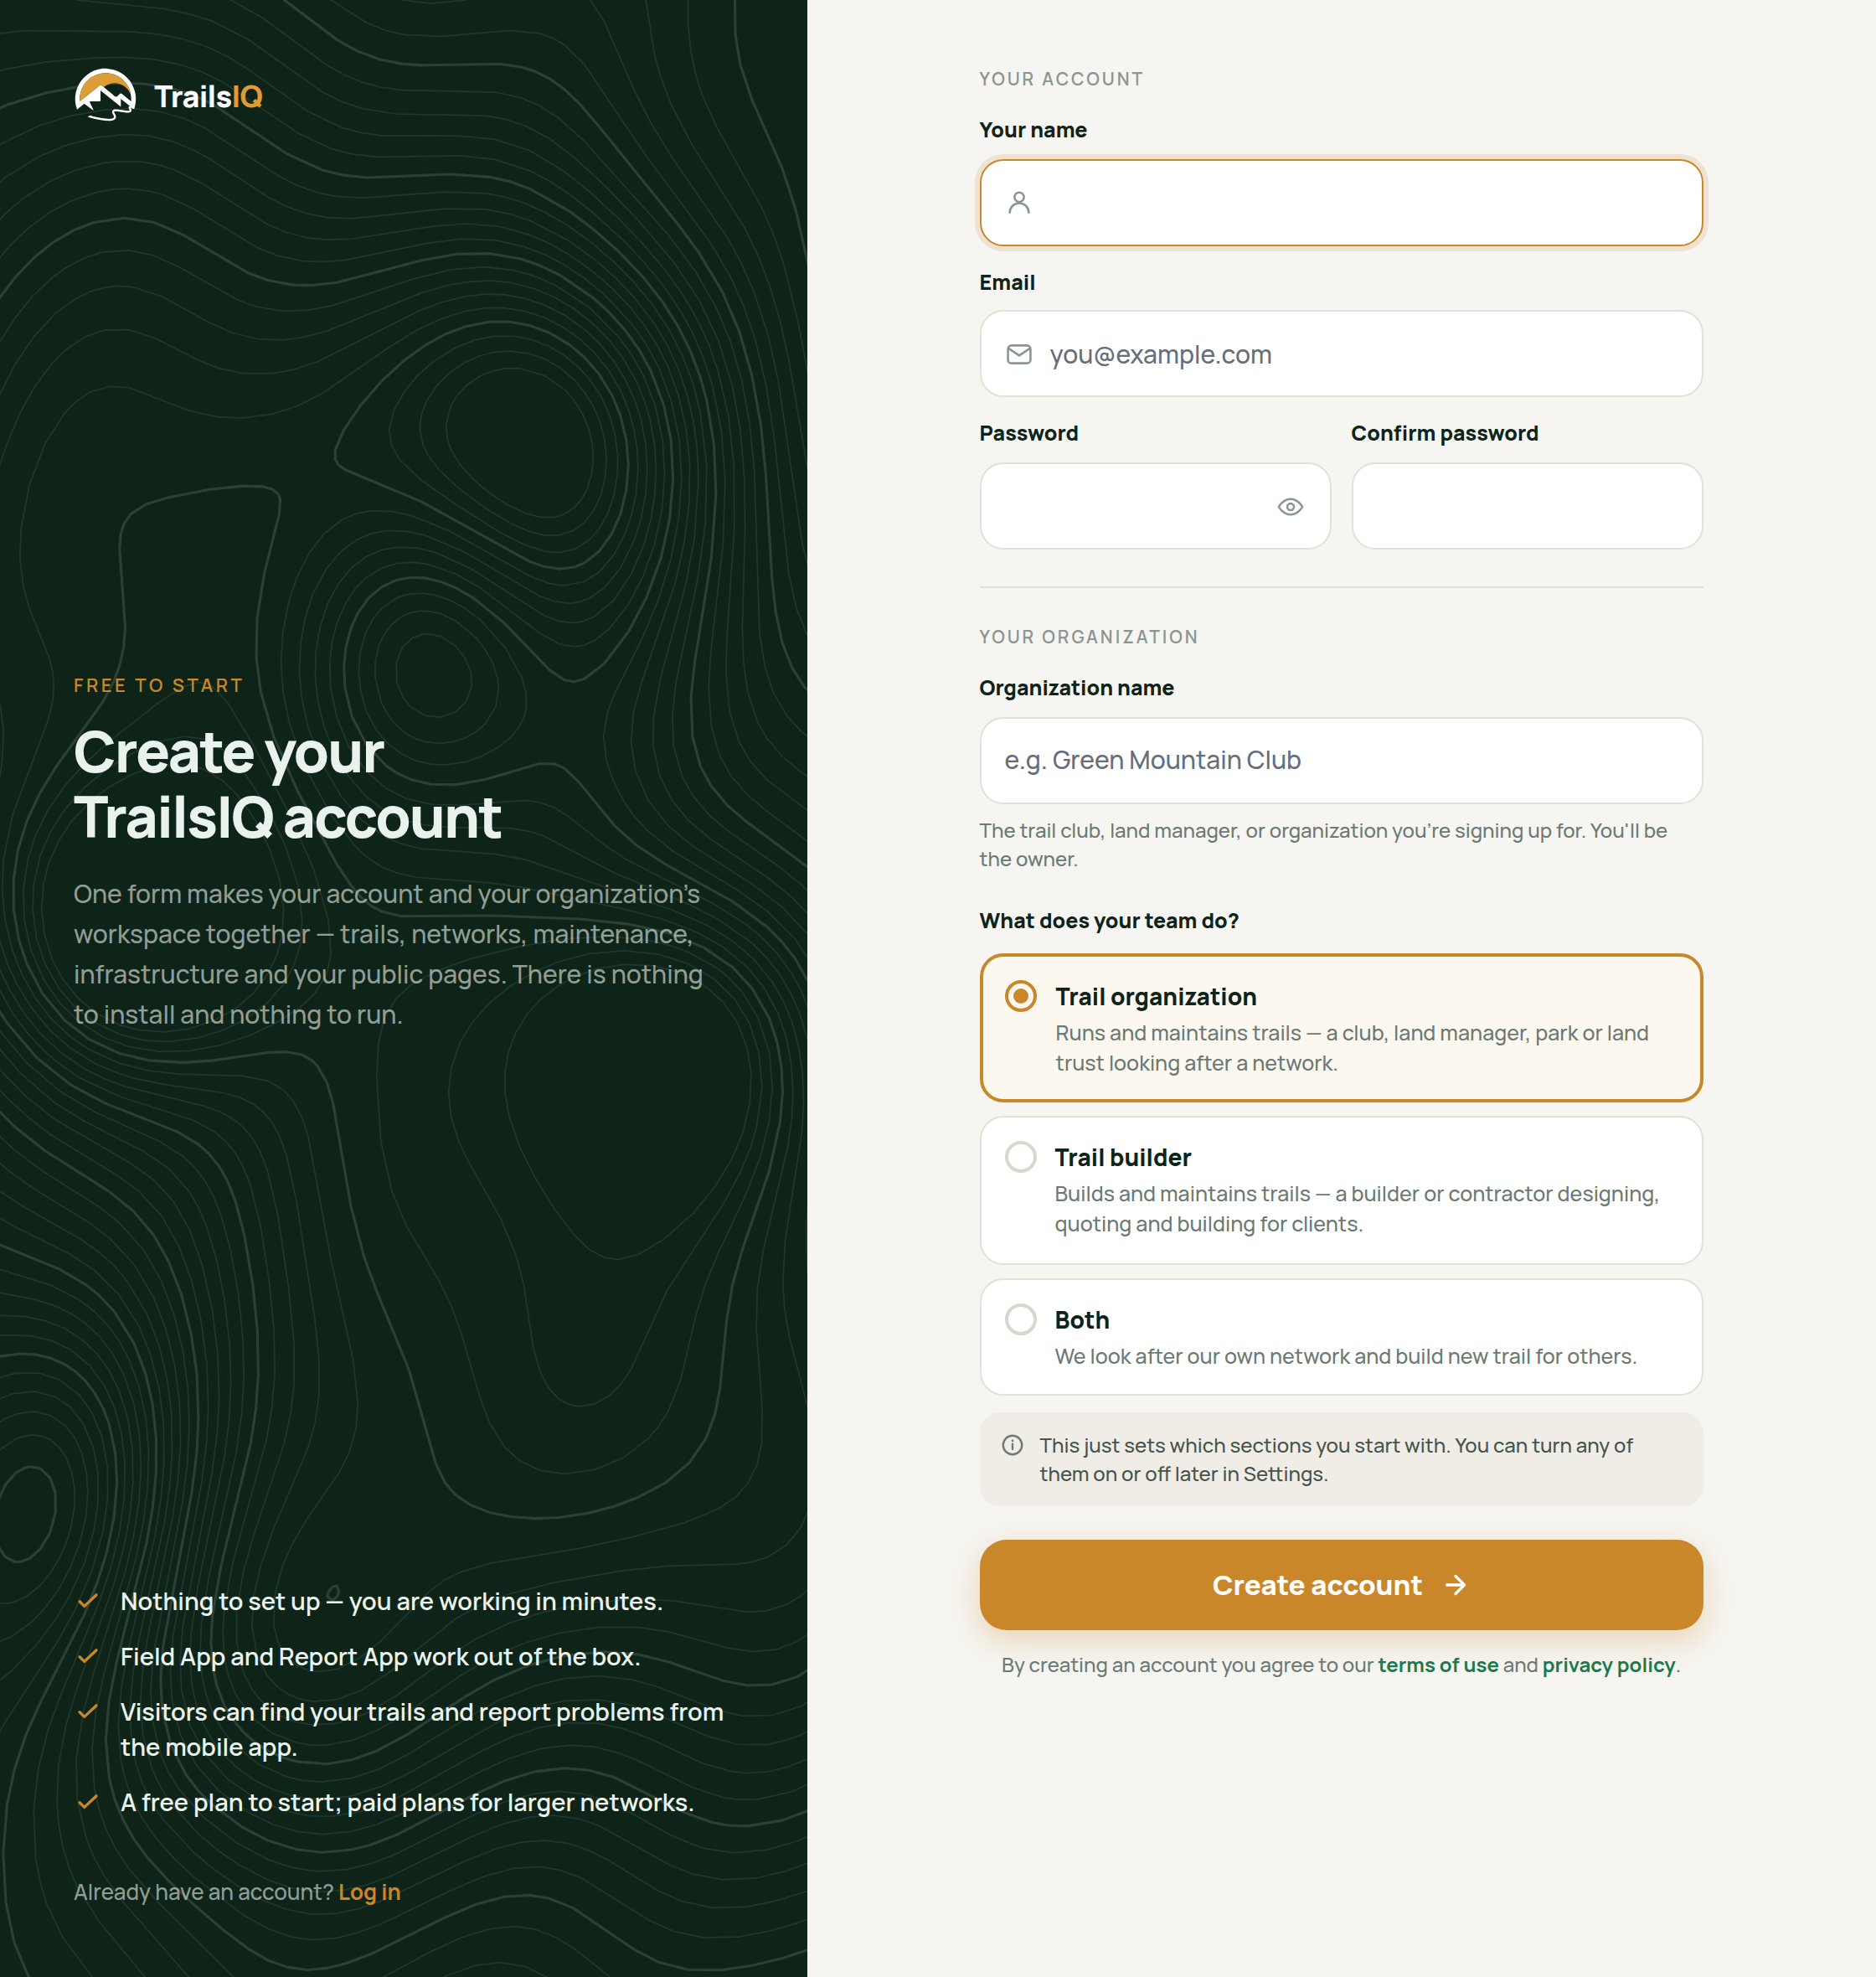
Signing up creates two things at once
Most tools make you create a login and then create a workspace. Here it is one step: submitting that form creates your account and your organization together, and makes you its owner.
That matters mainly because of what it means later — if you ever need a second workspace, that is a separate thing you do from inside the app rather than by signing up again with another email. See the last section.
What "What does your team do?" changes
The three choices are not a label. They decide which sections your sidebar starts with, so the app opens on the work you actually do instead of everything the product can do.
- Trail organization — you run and maintain a network. Trails, maintenance, infrastructure, conditions and the public side are front and center.
- Trail builder — you build for other people. Clients, jobs, quoting and handover come forward; the visitor-facing pieces step back.
- Both — you look after your own ground and build for others. You get the lot.
Nothing is locked by this. It is a starting layout, not a plan gate, and every section can be switched on or off afterwards in Settings → Workspace modules. If your sidebar is missing something you expected, that is the first place to look — not Billing.
Follow the setup guide
Once you are in, the dashboard offers a Setup guide — a checklist of the six things that make a workspace useful, in the order that makes each one easier than the last. It marks steps off as you do them and you can leave and come back.
You can reach it any time from the top of Documentation, and dismissing it does not delete anything.
The steps are worth reading in order even if you skip some:
- Tell us where you operate — the region your trails are in. It seeds the map and the weather.
- Create a trail network — the geographic group your trails belong to. Most organizations have one to start with.
- Add your first trail — import a GPX, draw it, or record it in the field.
- Invite your team — the people who will file and fix things.
- Customize your organization — name, logo, color. These show up on your public pages and on anything you export.
- Install the mobile field app — the half of the product your crew actually touches.
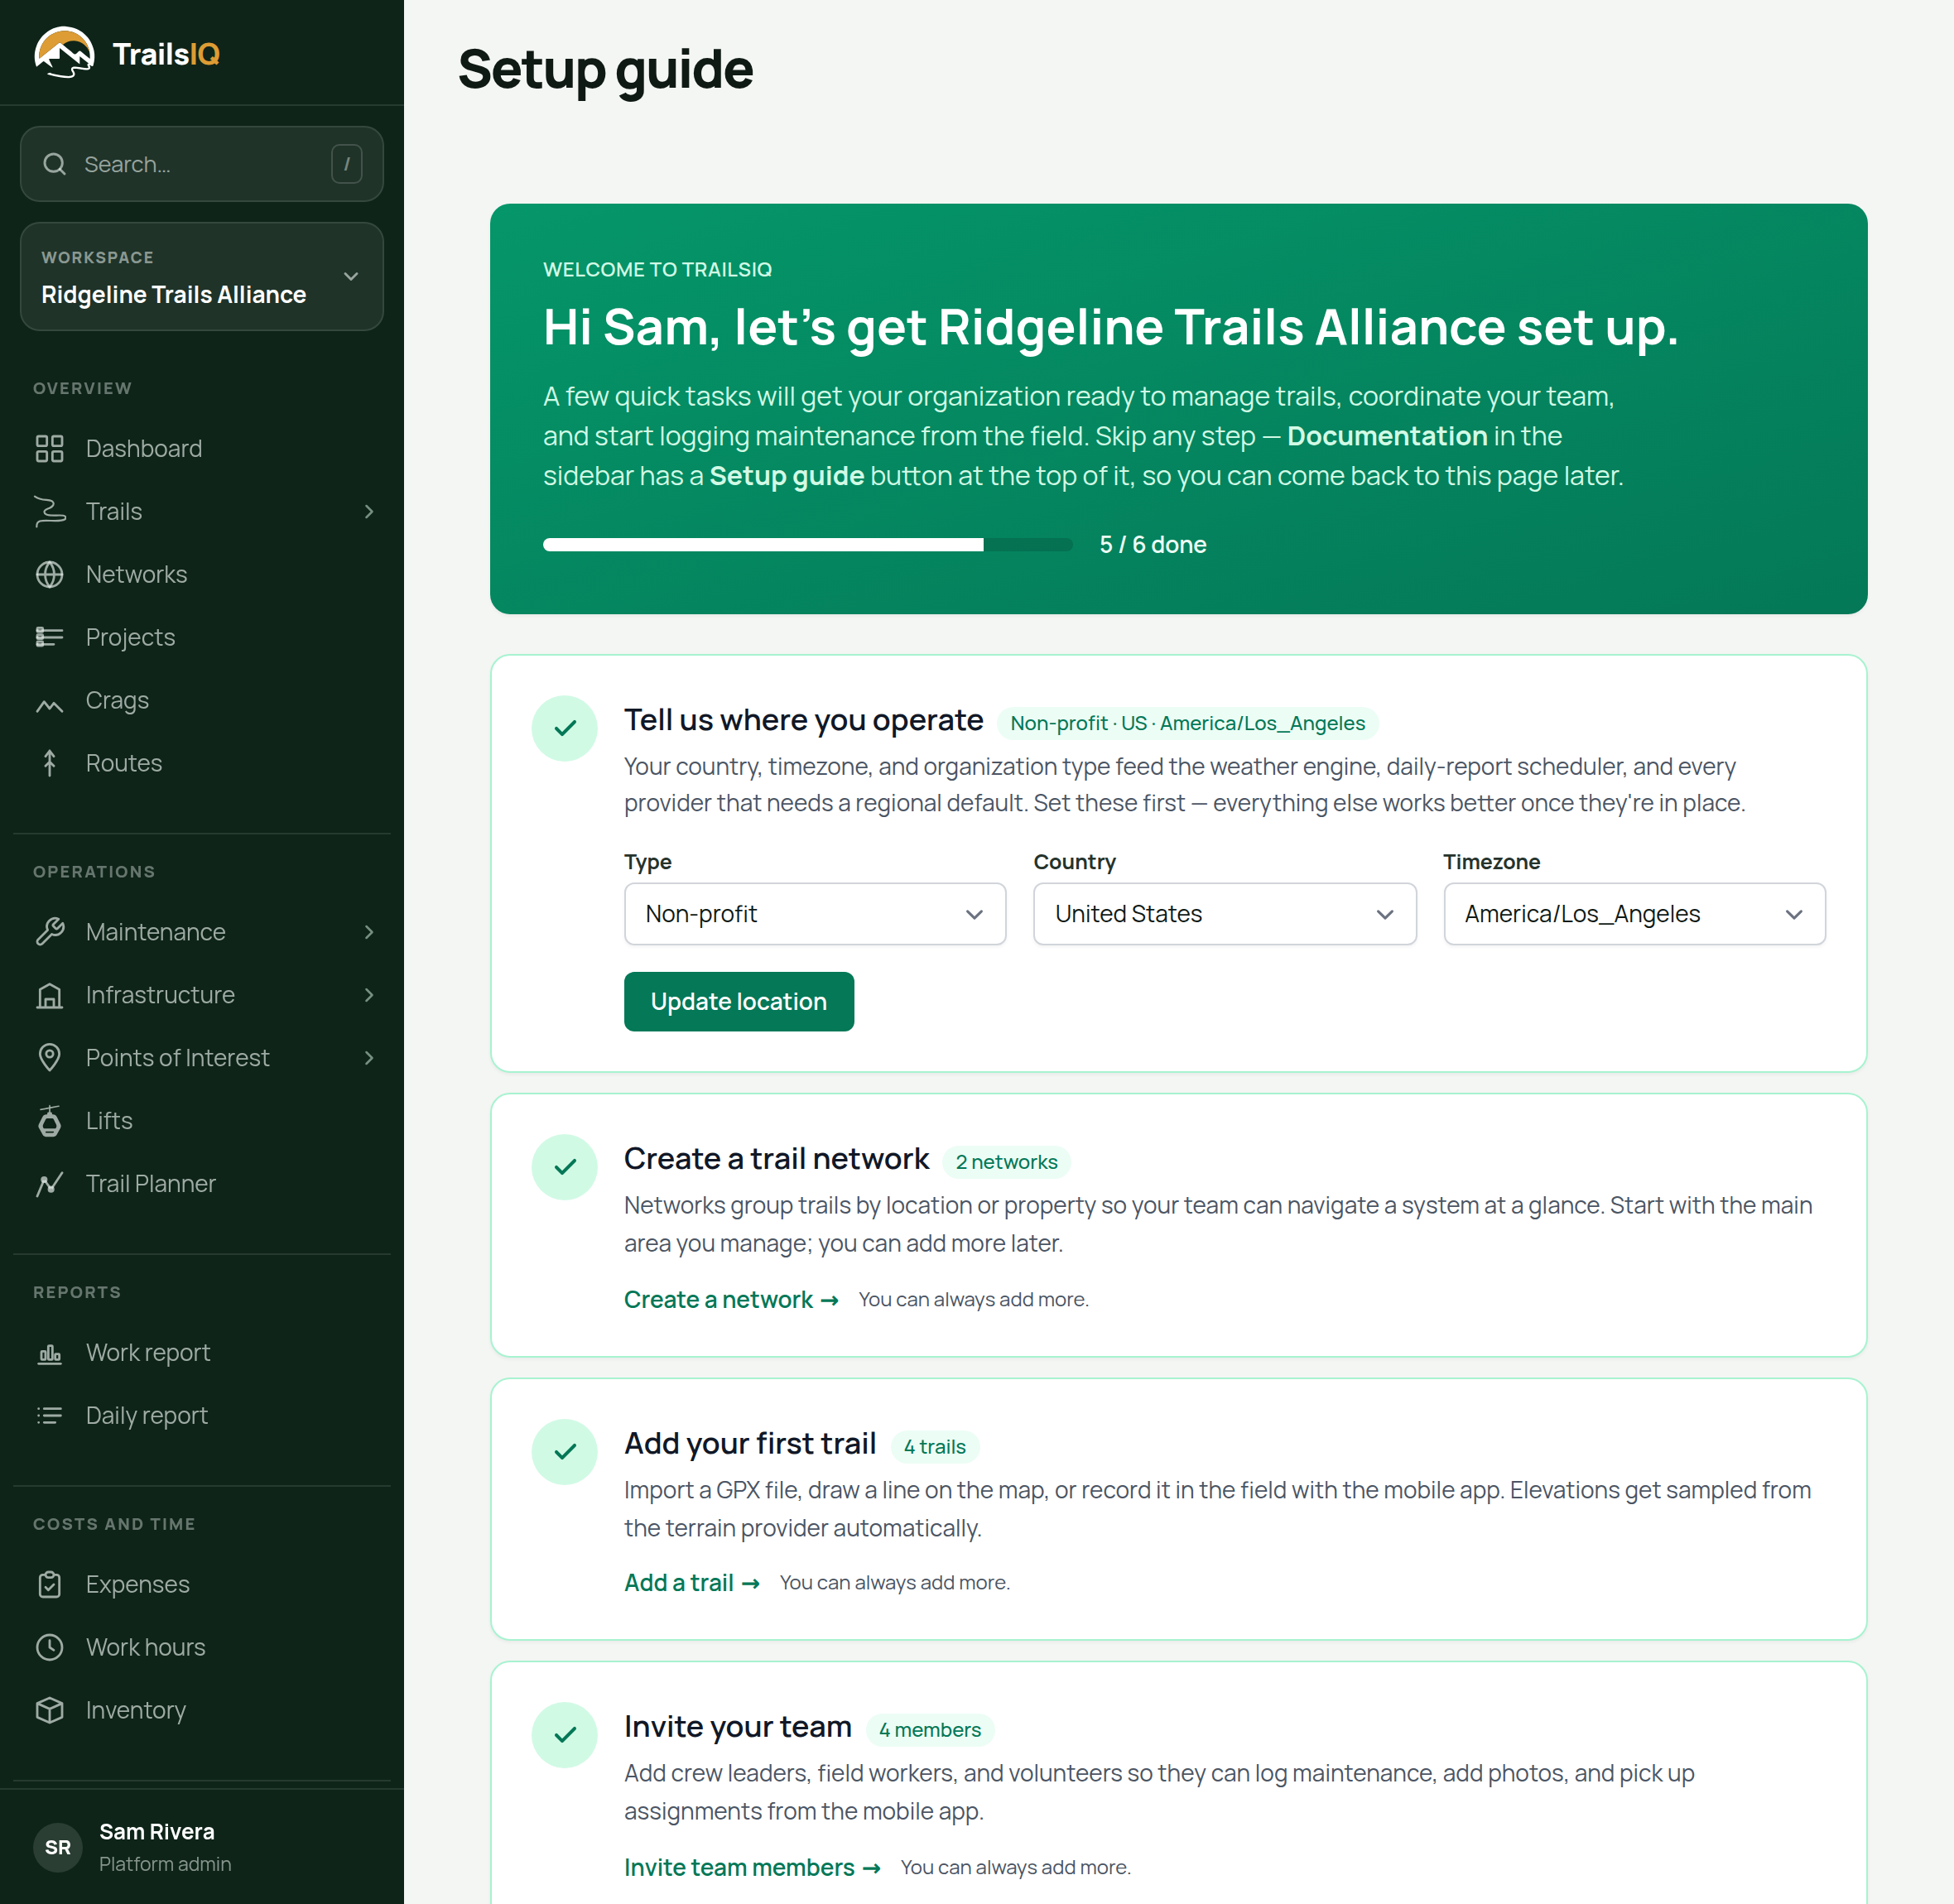
The order that saves you work
Two of those six are worth doing before the others, and it is not obvious which.
A network before a trail. A trail belongs to a network, and making the network first means you are not editing every trail afterwards to put it in one.
Yourself before your team. Walk one trail through the field app on your own phone before you invite anybody. You will find out what your crew is about to ask you, and it is a much shorter conversation when you already know the answer.
Where to go next
- TrailsIQ Field App — install, login, and daily use — the app your crew installs, and what they do with it day to day.
- How to create a network and How to create a trail — getting real ground into the workspace.
- Import trails — if you already have GPX files, start here instead.
- Members, roles & permissions — inviting people and deciding what each of them can change.
- Plans and limits — what the free plan holds, and what moves you up.
A second workspace
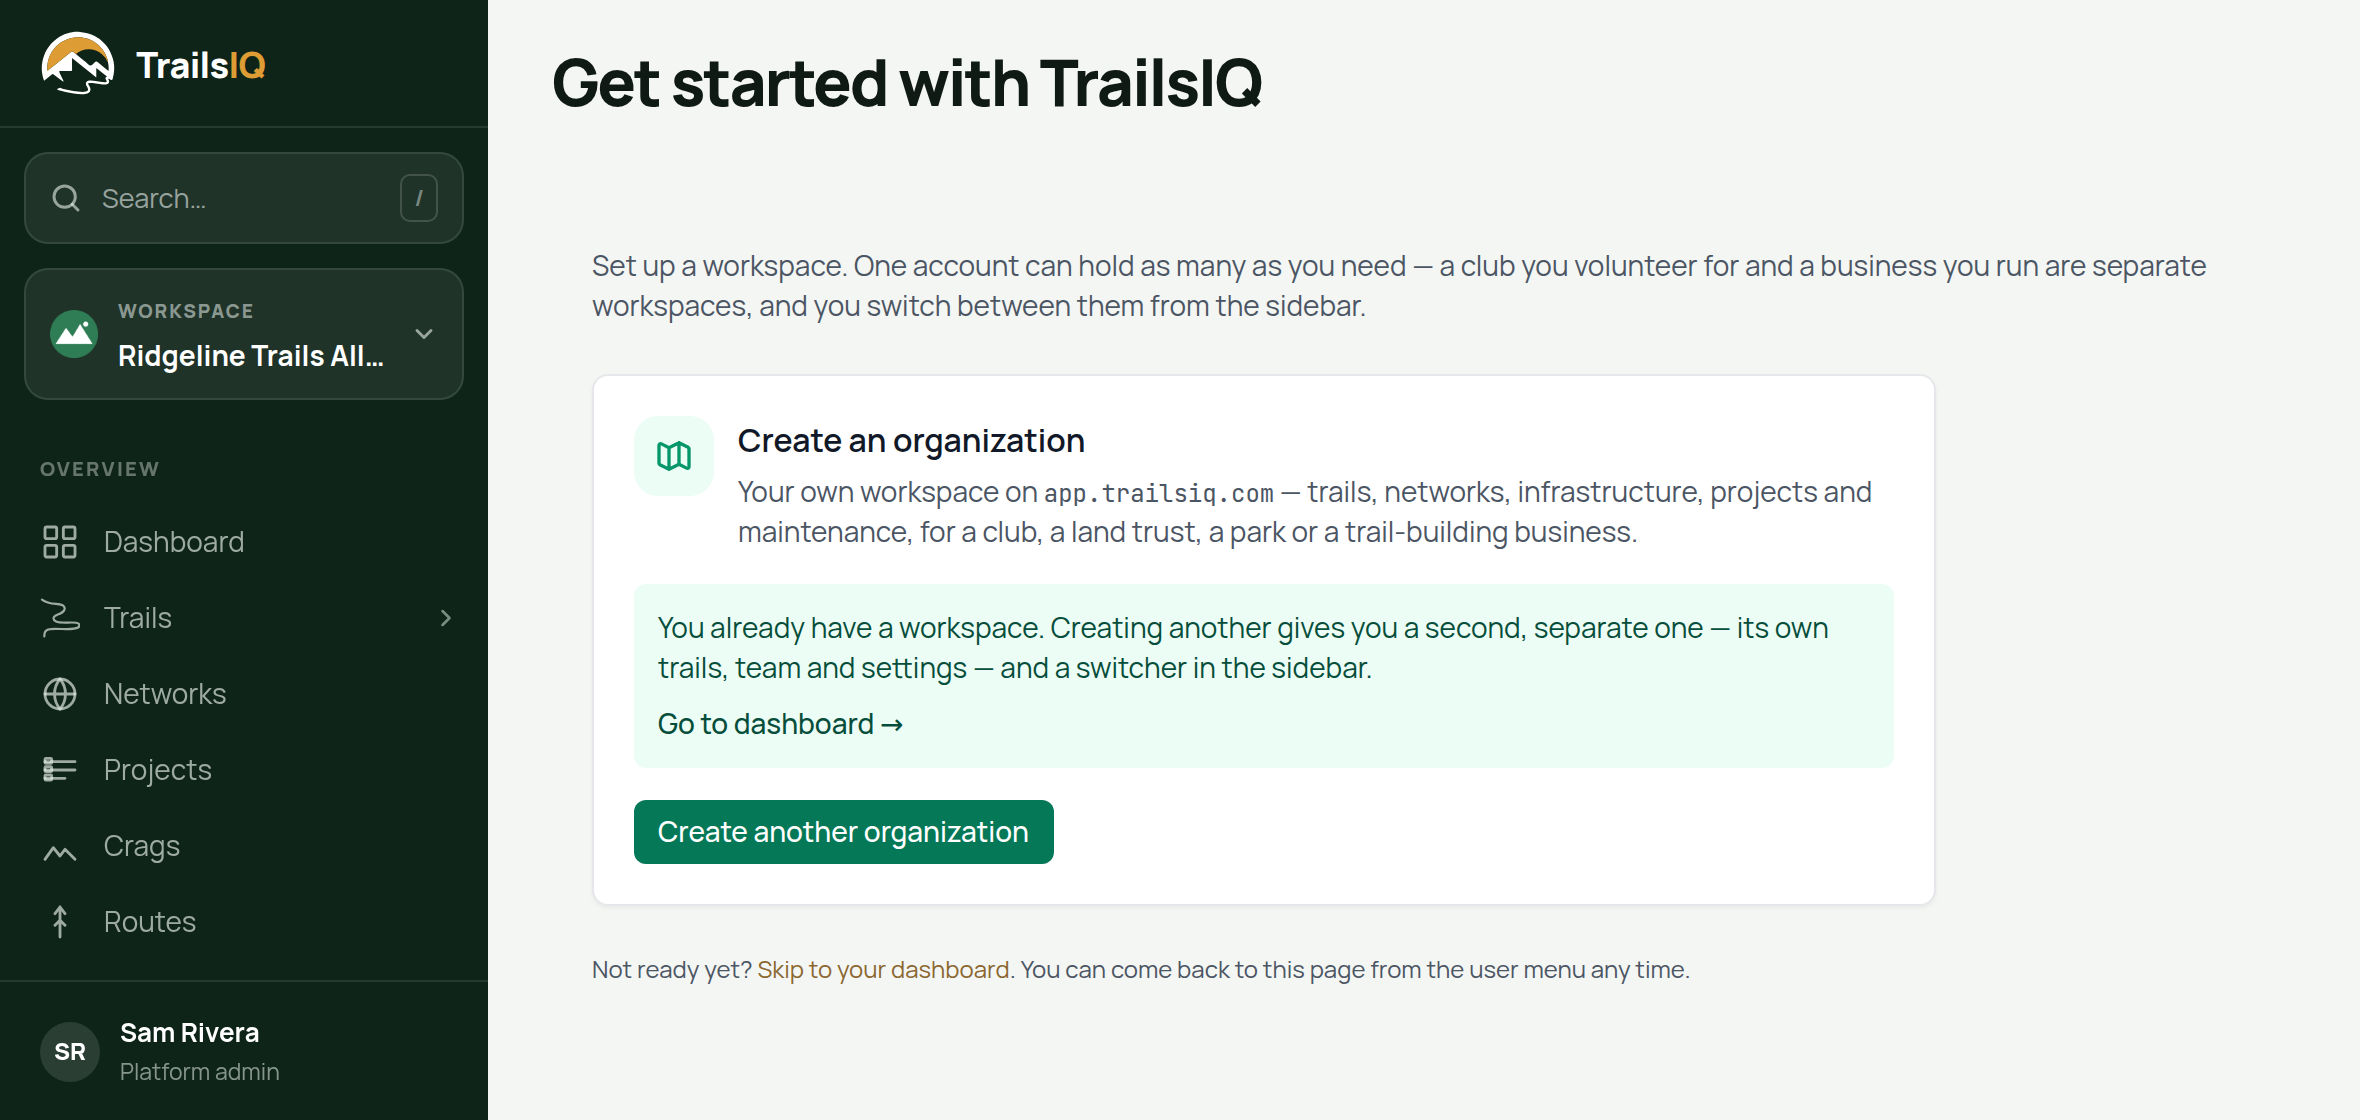
Somebody who volunteers for a club and also runs a trail-building business needs two separate workspaces, not one workspace pretending to be two.
Settings → Advanced → New organization creates another one, and there is no cap and no approval step. The workspaces are fully separate — their own trails, team, settings and billing — and once you have more than one, a switcher appears at the top of the sidebar.
You are asked "what does your team do?" again for the new workspace, because the answer is usually different.
Common gotchas
Your sidebar looks emptier than the documentation. That is the workspace preset doing its job. Settings → Workspace modules turns sections on and off, and three of them can never be hidden — Organization details, Workspace modules and Roles & permissions — so there is always a way back.
Signing up again with a second email does not give you a second workspace. It gives you a second account, with its own sign-in and nothing shared. Use New organization instead.
Renaming your organization does not change its web address. The display name is yours to change any time in Settings → Organization details, and it updates everywhere your team and your visitors read it. The address your public pages sit at is built from the name you type at signup and stays as it is — so put the real name into that first form rather than a placeholder you mean to fix later.
Invited people do not need to make an account first. An invitation email carries its own sign-up link and drops them straight into your workspace with the role you gave them. Sending somebody to the public Sign up page instead is how you end up with a colleague sitting in an empty workspace of their own.